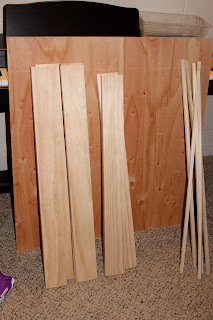
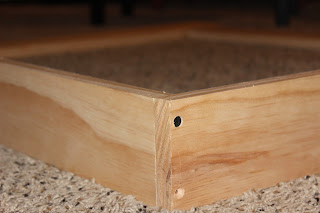
The day has come! I've had the supplies for months , but I finally finished this bookshelf that displays the book covers! My kids initiate reading tons more now, so I think it's worth every penny and all the effort!! Here's how it's done...
Materials Needed:
Back Square Piece (34.5" x 36")
1 x 4 x 6' Wood boards (4 boards 34.5" for the perimeter, 2 boards 33" for shelves)
6 Dowels (this time I tried the square ends rather than the circular ends)
Wood Filler or Wall Spackle
White Primer
Paint color
Tools Needed:
Power drillHand saw (to cut dowels to correct size)
Sand paper
Screws (1 5/8 in.)
Countersink tool (to embed your screws so you can cover with filler for smooth finish)
1. Decide what size bookshelf you want. If you can get a back piece for cheap (like at Home Depot's "Cull Lumber" - which are their discounted scraps usually from 50 cents - $4) that may decide what size you can do. For my previous bookshelf, I used Lowe's bead board so I had to do 2' x 3'.
I choose to have 4 pieces - 34.5" long.
2. Begin to screw all sides together. I used my countersink tool to pre-drill holes for the screws. After the screws were all in, I used wood filler to cover up the holes. After it dries, you sand those spots.
3. Screw the backing on. I had trouble getting my square back to perfectly fit just fyi. So mine doesn't match up just right. I ended up having to do a lot of sanding and it wasn't at all perfect - but oh well! I did about 4 screws along each side.
4. Put in your 2 middle shelves and screw them in along the sides and back.
6. Sand the whole project. First coarse and then fine. Maybe it's because I bought the cheapest electric sander, but I think I prefer just using my hand. My project could have used a ton more sanding but I just didn't have the time! At one point I had Penny in my carrier and the kids swarming around me on their bikes in our community laundry room while I tried to bust out the electric sander! It must have been a funny sight to see.
7. Prime and Paint. You want to prime the new wood so your wood doesn't completely soak up all your final paint. I used a roller brush and regular paint brush just for the edges.
8. Cut the dowels (which keep the books in) to just the right size.It's better to cut a little big at first since it's easy to quickly saw to make it a perfect fit.
9. Pre-drill pilot holes through the sides and dowels to prevent breaking the wood. After screwing each dowel into place on both sides, cover holes with filler/spackle. I also spackled each corner for a smoother finish. When dry, sand those spots and touch up paint.
10. And you have your awesome bookshelf! I used these corner brackets (directly under the middle shelves, screwed into the wall studs) to make it extra sturdy.


I love this idea!!! After seeing it, I went and looked on Amazon and they were $130-$250!!! Yikes!! I'm so glad you showed me how to make it! Maybe I can recruit my husband to get on board with the project too and get it done by Christmas! Thanks a ton! :)
ReplyDelete